
To enable a photocell to control certain groups in the installation, follow these steps:
1. Go to Device Control > Integration.
2. Select the appropriate N3 Satellite from the My Control Devices list on the left.
3. Go to the Analog I/O tab.
4. Consult the Ketra submittal to see which port the photocell is wired to. There are 4 Analog I/O ports on the N3 Satellite. In the Ketra submittal, “COM1” corresponds to Port 1, “COM2” to Port 2, etc. (See fig. 133.)
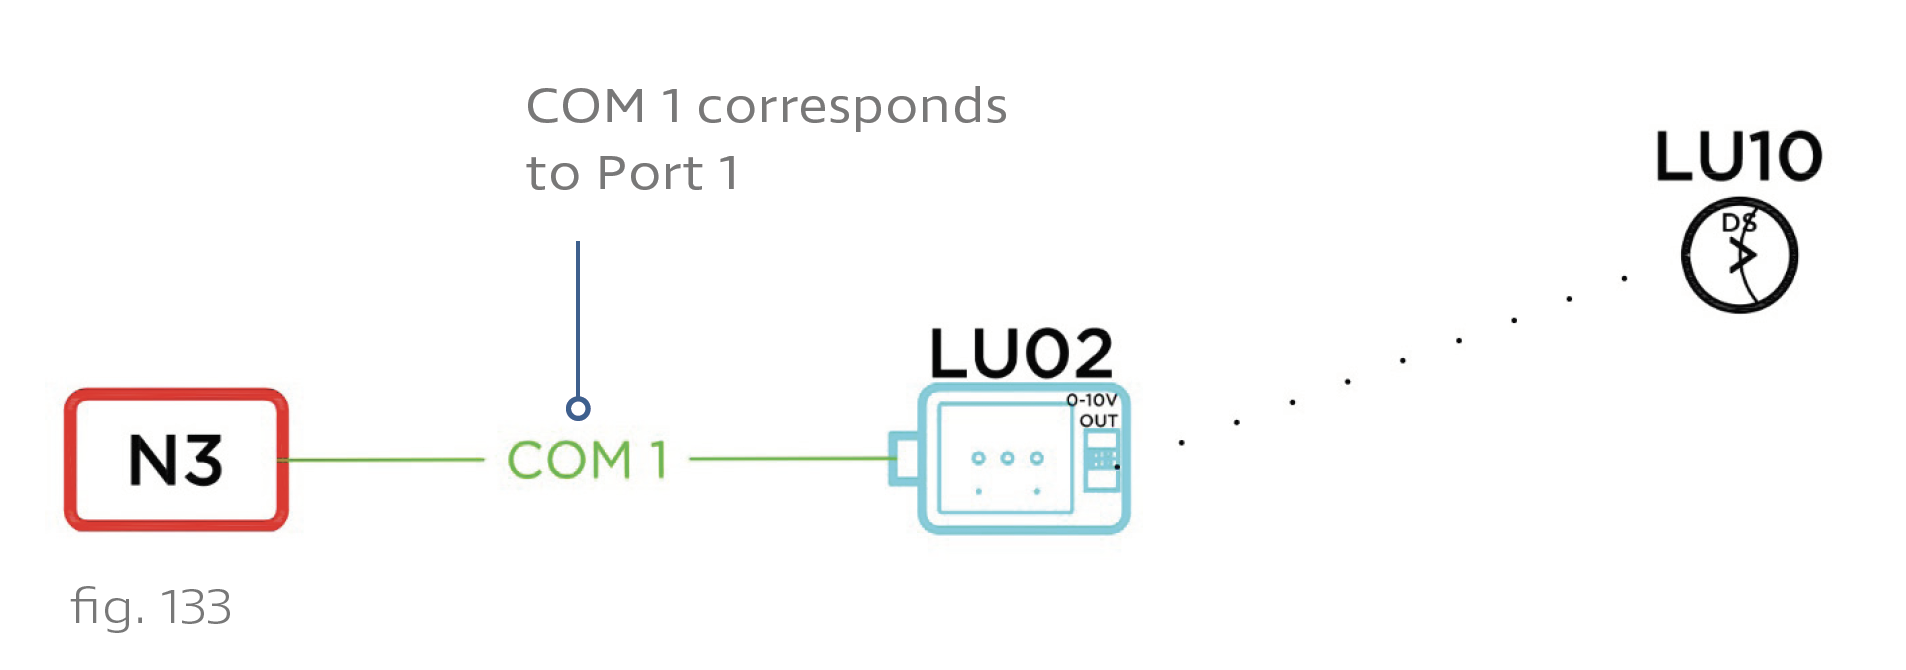
Note: If the submittal shows the photocell connecting to two ports, only configure the first port. The second will be automatically included once you select a profile in step 7.
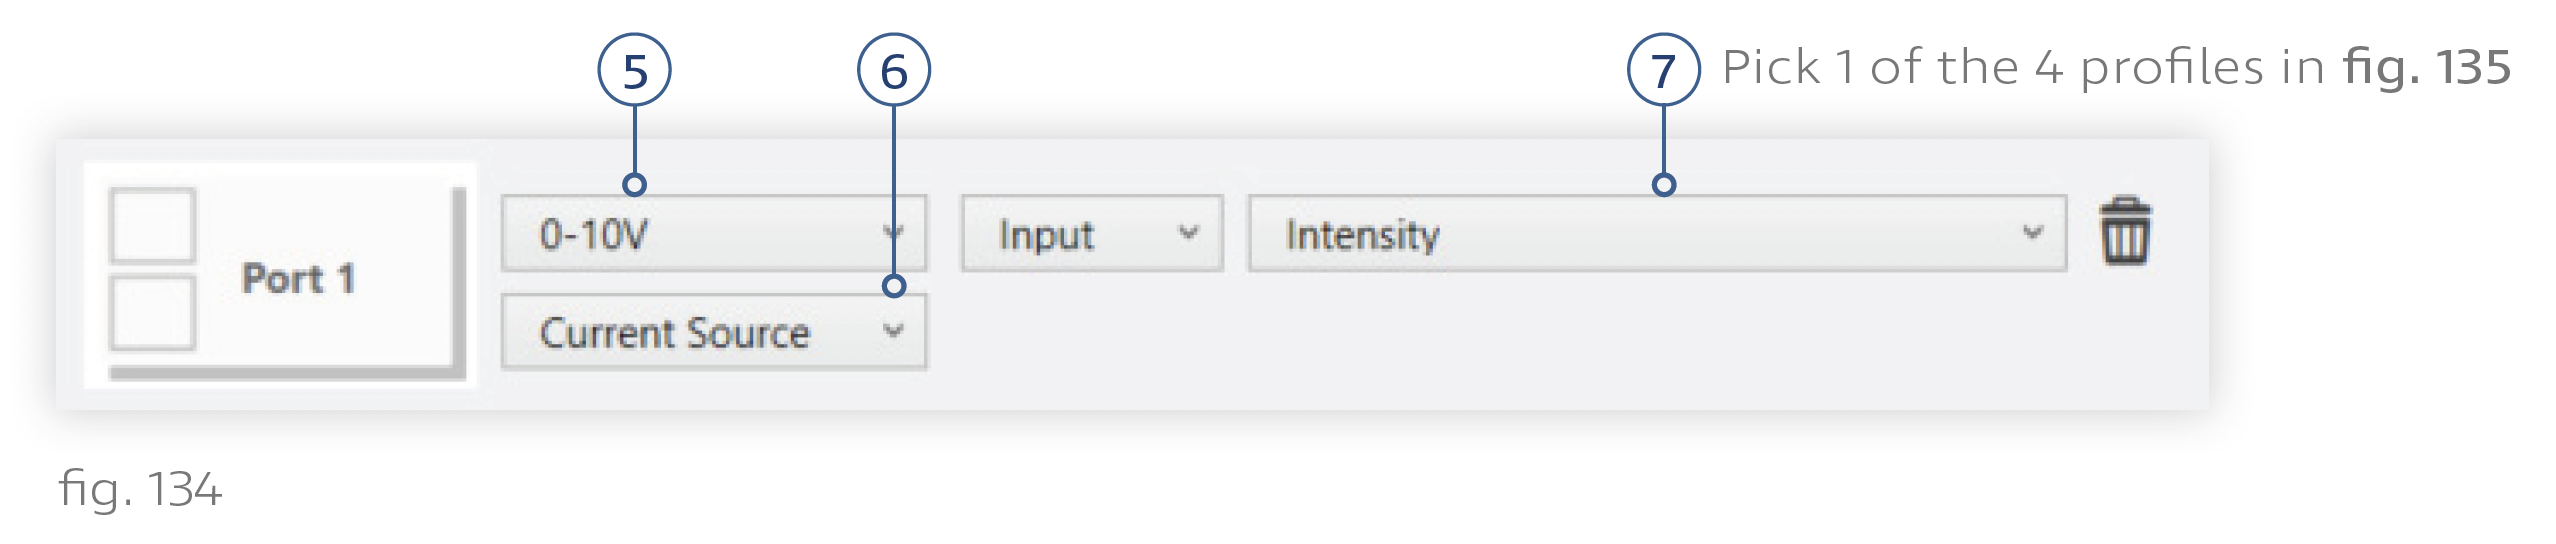
5. Set the Port Type dropdown to 0-10V.
6. Set the lower dropdown to "Current Source".
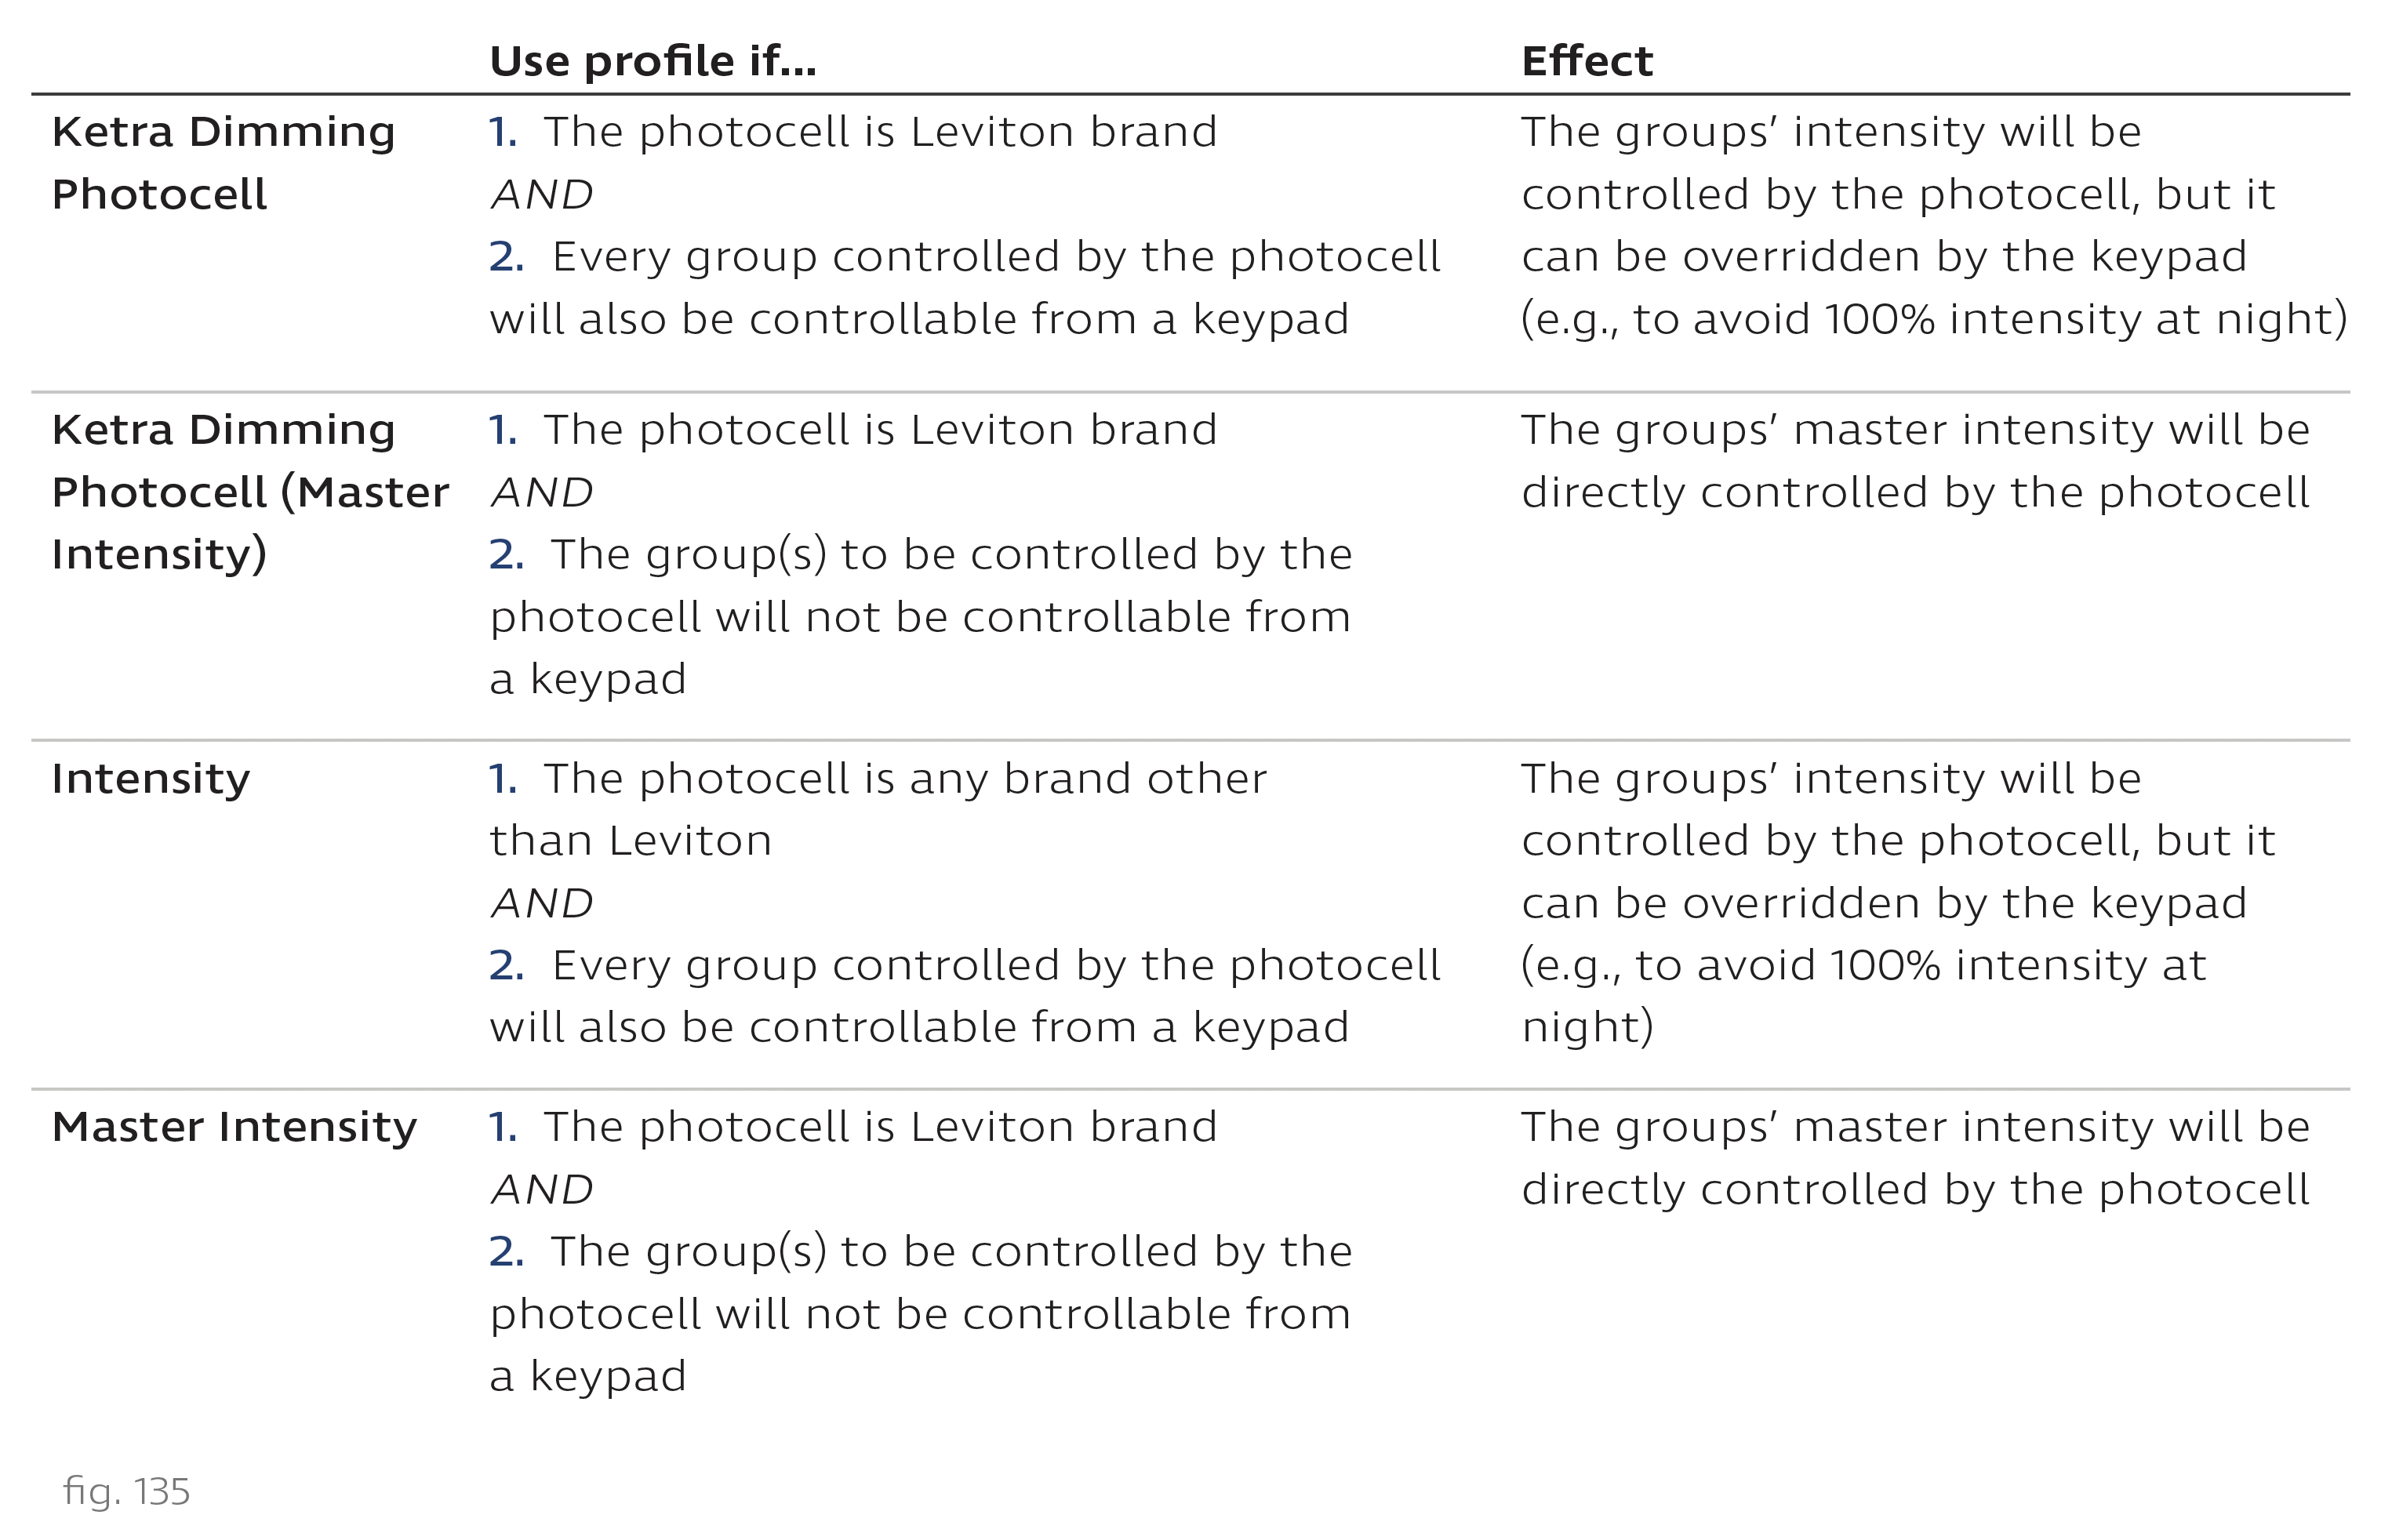
7. Use the dropdown on the right to set the profile of the input.
8. Click Next.
9. Use the checkboxes to determine which groups should be dimmed by the sensor.
Note: The Master Brightness Override and Analog IO Refresh checkboxes should be left unchecked for photocells.
10. Click Next.
The port is now configured to receive and process contact-closure input from the occupancy or vacancy sensor.
Troubleshooting Unexpected Behavior
- Adjust the ultrasonic and infrared configurations on the device.
- Confirm that the sensor has been wired to the correct port on the N3 Satellite.
- Double-check your configurations in Design Studio.